
Nothing ruins the aesthetic of a high-end workstation faster than a chaotic bird’s nest of power cords, bulky AC adapters, charger bricks, and ethernet lines dangling beneath your furniture. Beyond destroying your setup’s sleek look, loose cords trap dust, get snagged by your knees, and create serious tripping hazards.
In 2026, the undisputed foundation of every modern, wire-free workstation is a heavy-duty Under-Desk Tray.
By lifting bulky power strips, surge protectors, power bricks, and excess cord length completely off the floor and stowing them flush against the bottom of your desktop deck, installing a functional Under-Desk Tray creates an organized, minimalist environment. This masterclass guide covers tray materials, mounting styles, standing desk routing, thermal considerations, and installation tips to help you achieve a perfectly streamlined setup.
Cable Sleeves: The Ultimate 2026 Guide to Seamless Cable Management
Table of Contents
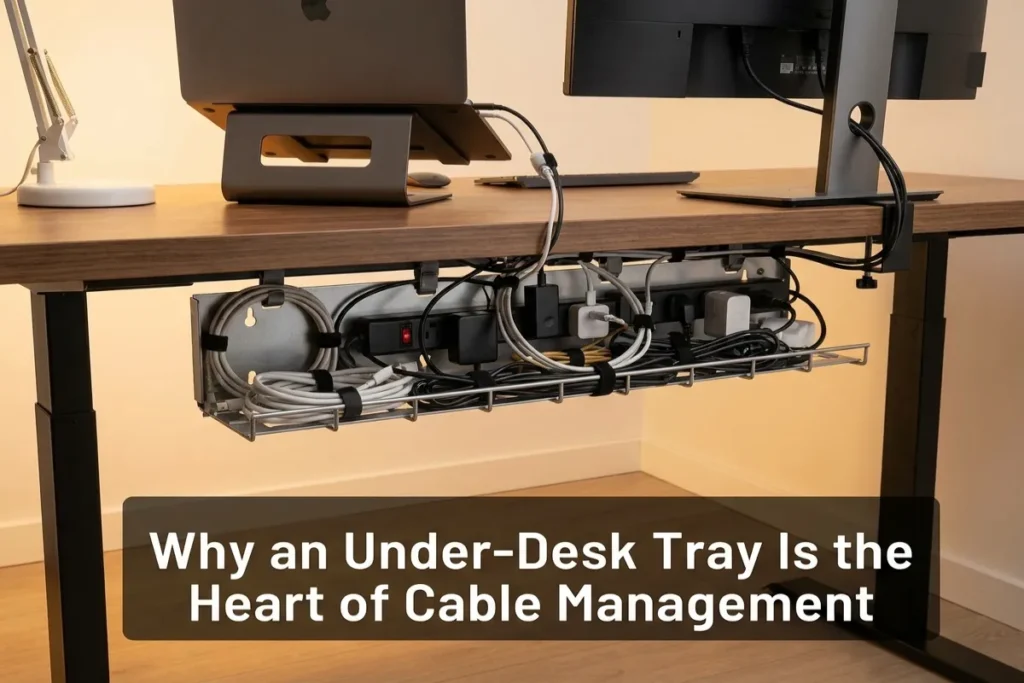
Why an Under-Desk Tray Is the Heart of Cable Management
While cable sleeves gather loose cords into bundles and desktop clips anchor charger heads, neither tool solves the fundamental problem: hiding heavy power strips and oversized power bricks.
+-------------------------------------------------------------------------+
|                FLOOR CABLE CHAOS VS. UNDER-DESK TRAY                    |
|                                                                         |
|   UNMANAGED FLOOR CHAOS:                                                |
|   - Heavy power strips resting in dust bunnies on carpet                |
|   - Accidental foot kicks unplugging PCs mid-work session               |
|   - Dangling wires caught during standing desk height adjustments       |
|   - Robotic vacuums tangled in loose floor cords                        |
|                                                                         |
|   UNDER-DESK TRAY CONCEALMENT:                                          |
|   - Power strips, adapters, & excess wire elevated off the floor        |
|   - Completely invisible cable runs from normal sitting angles          |
|   - Single-cord power drop from desk deck to wall outlet                |
|   - Total legroom freedom with zero foot-zone interference              |
+-------------------------------------------------------------------------+
1. Reclaiming Legroom and Protecting Equipment
Placing power strips on the floor leads to accidental unplugging, dust accumulation, and restricted foot movement. Elevating your power hubs into a concealed Under-Desk Tray frees up legroom while protecting sensitive connections from kicks and vacuum cleaners.
2. Seamless Standing Desk Integration
Motorized standing desks move up and down continuously throughout the workday. Hanging individual cords from wall outlets creates tension that can pull plugs out or damage ports as the desk rises. Stowing all power adapters inside an under-desk basket lets your devices move together smoothly, requiring only a single main cord drop to the wall outlet.
Breakdown of Core Under-Desk Tray Styles
Selecting the ideal tray depends on your desk construction, whether you can drill holes into the desktop, and how many heavy power bricks you need to stow.
+-------------------------------------------------------------------------+
|                     CORE UNDER-DESK TRAY STYLES                         |
|                                                                         |
|   [1. CLAMP-ON METAL MESH]      [2. SOLID STEEL SCREW-MOUNT]            |
|   - Zero drilling required      - Maximum weight capacity               |
|   - Maximum passive ventilation - Completely hides internal cords       |
|   - Padded desk edge clamps     - Permanent architectural install       |
|                                                                         |
|   [3. FLEXIBLE FABRIC / NET]    [4. REAR CHANNEL RACEWAY]               |
|   - Lightweight mesh fabric     - Long trough spanning desk width       |
|   - Snaps onto frame beams      - Integrates with privacy screens       |
+-------------------------------------------------------------------------+
1. Clamp-On Wire Mesh Trays
For users with thin desks, glass tops, or rented furniture where drilling isn’t an option, clamp-on mesh trays are an excellent choice. These units attach to the rear edge of your desk using padded C-clamps. Their open wire design allows maximum airflow to cool high-wattage power bricks.
2. Solid Powder-Coated Steel Screw-Mount Trays
Designed for solid wood or butcher block desktops, screw-mounted steel trays offer maximum load capacity. They feature solid front panels that completely conceal internal power strips and cable loops from view, leaving a sleek, flush finish.
3. Flexible Flame-Retardant Fabric Mesh Nets
Fabric cable management nets use elastic flame-retardant mesh stretched across mounting hooks attached beneath the desk frame. They conform smoothly around oversized power adapters and provide flexible storage for extra cord slack.
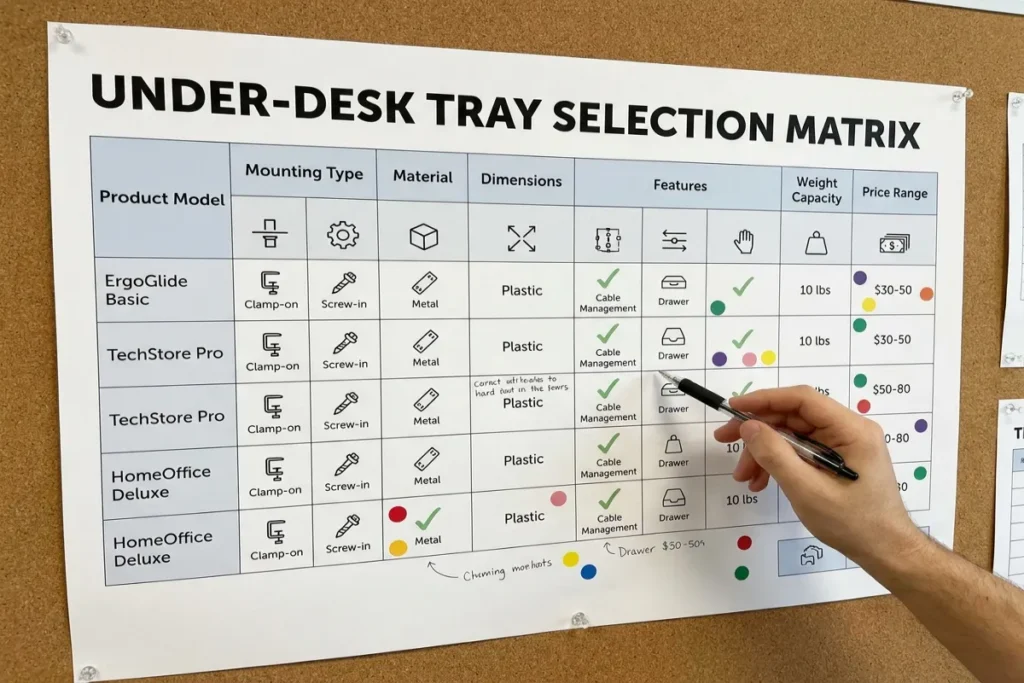
Under-Desk Tray Selection Matrix
Compare key features across common tray designs to determine the right option for your desk setup:
| Tray Style | Mounting Mechanism | Weight Capacity | Heat Dissipation | Best Application |
| Clamp-On Wire Mesh | Dual Rear C-Clamps (No Drill) | 10 to 15 lbs | Superior (Open Wire) | Rental offices, glass/thin desks, quick installs |
| Solid Steel Trough | Wood Screws into Under-Deck | 25 to 40+ lbs | Moderate (Solid Wall) | Permanent gaming/work rigs, heavy power bricks |
| Fabric Mesh Net | Anchor Screws / Frame Clips | 8 to 12 lbs | Excellent (Breathable Mesh) | Minimalist standing desks, irregular under-frames |
| Dual-Access Raceway | Drop-Down Hinged Brackets | 20 to 30 lbs | Good (Vented Slots) | Complex AV setups, setups requiring frequent updates |
Interactive Under-Desk Tray Capacity Calculator
Determine the exact tray width, depth, weight capacity, and mounting system needed for your workstation using our interactive calculator below.
The Single Power Drop Architecture
To achieve a clean, wire-free workstation, your cable tray must serve as the central power node for the entire desk.
+-------------------------------------------------------------------------+
|                  SINGLE POWER DROP ARCHITECTURE                         |
|                                                                         |
|   DESK DECK PERIPHERALS:                                                |
|   [ Monitor 1 ]    [ Monitor 2 ]    [ PC Rigg ]    [ Desk Lamp ]       |
|         │                │               │               │              |
|         └────────────────┼───────────────┴───────────────┘              |
|                          ▼ (Routed through grommet holes)               |
|   ===================================================================   |
|   [ UNDER-DESK TRAY CONCEALMENT ZONE ]                              |
|   - Multi-Outlet Surge Protector Power Strip                            |
|   - Monitor Power Transformers & Docking Station Bricks                 |
|   - Bundled Excess Cord Length                                          |
|   ===================================================================   |
|                          │                                              |
|                          ▼ (Single braided sleeve drop)                 |
|                 [ WALL POWER OUTLET ]                                   |
+-------------------------------------------------------------------------+
1. Centralizing All Connections Inside the Tray
Every cord on your desk—including monitor power lines, display cables, laptop docks, desk lamps, and audio speakers—should route directly into your under-desk tray. Connect all power cords to a single multi-outlet surge protector mounted inside or alongside the tray.
2. Executing the Single Drop Run
With all hardware powered inside the tray, only one main cord drops from the desk down to the wall receptacle: the main power cable of your surge protector. Wrap this single cord in a flexible braided sleeve for a sleek, unified look.
5 Step Installation Masterclass
Follow these steps to securely install your tray:
- Map Out Under-Desk Clearance: Before drilling or clamping, check the placement of crossbars, motorized desk legs, and drawer slides beneath your desk to ensure the tray won’t block moving parts or legroom.
- Pre-Drill Screw Holes Carefully: When installing a screw-mounted metal tray into wood, measure your desktop thickness first. Use a drill bit stop collar set to 1/2 inch to prevent drilling through the top of your desk.
- Mount the Power Strip Inside First: Secure your main surge protector inside the tray using heavy-duty velcro tape or keyhole mounting screws before adding individual device cords.
- Bundle and Stow Excess Cord Lengths: Coil long cables into neat 6-inch loops and secure them with reusable hook-and-loop straps before placing them in the tray.
- Test Standing Desk Range of Motion: If using a motorized standing desk, raise the desk to its maximum height to verify the main power drop cord has enough slack without pulling on the wall outlet.
Thermal Management and Safety Rules
Stowing multiple high-wattage power supplies together generates heat. Keep your setup running safely with these core guidelines:
- Avoid Overcrowding Transformers: Leave at least 1 inch of space between high-draw power bricks (such as gaming laptop chargers or OLED monitor supplies) to allow heat to dissipate naturally.
- Never Cover Vents on Power Adapters: Position power supplies so their ventilation grilles face outward toward open air rather than against metal walls inside the tray.
- Choose Flame-Retardant Materials: Ensure fabric or plastic trays carry certified flame-retardant safety ratings (such as UL94 V-0 compliance).
- Keep Cord Loops Loose: Avoid bending power cables at sharp right angles where they exit adapters. Bending cords too tightly damages internal copper strands and can cause short circuits over time.

Elevate Your Workspace with The Tek World
Installing a durable Under-Desk Tray is the most effective way to eliminate cable clutter and build a clean, functional workspace. By stowing power strips, charger bricks, and cord slack flush beneath your desk deck, you protect your hardware, free up legroom, and maintain an organized environment.
Looking for comprehensive reviews on clamp-on cable baskets, under-desk steel troughs, standing desk wire trays, and power distribution setups updated for 2026? Visit thetekworld.com for expert buying advice, hardware breakdowns, and workspace optimization guides!
Frequently Asked Questions (FAQ)
1. Can I install an under-desk cable tray on an IKEA hollow-core honeycomb paper desk?
Standard wood screws will not hold securely in hollow-core honeycomb desks (like the IKEA Linnmon or Lagkapten). For hollow-core desks, use a clamp-on under-desk tray that grips the solid rear frame edge, or use specialized hollow-wall anchors designed for thin laminate skins.
2. How deep should an under-desk tray be to hold large gaming laptop charger bricks?
Look for a tray with an internal width/depth of at least 4 to 5 inches (10 to 12 cm) and a vertical height clearance of 4 inches. This leaves plenty of room to lay wide power bricks flat alongside standard multi-outlet power strips.
3. How do I stop an under-desk tray from bumping into my knees when sitting?
Mount the tray as far back toward the rear edge of your desk deck as possible—ideally within 2 to 4 inches of the back edge. Placing the tray behind your monitor mounts keeps it well outside your natural knee clearance zone.
4. Are metal wire mesh trays better than solid plastic or fabric trays?
Metal wire mesh trays offer the best overall balance of strength, heat dissipation, and routing flexibility. The open wire grid allows heat to escape easily while providing endless tie-down anchor points for securing loose cables with velcro straps.
