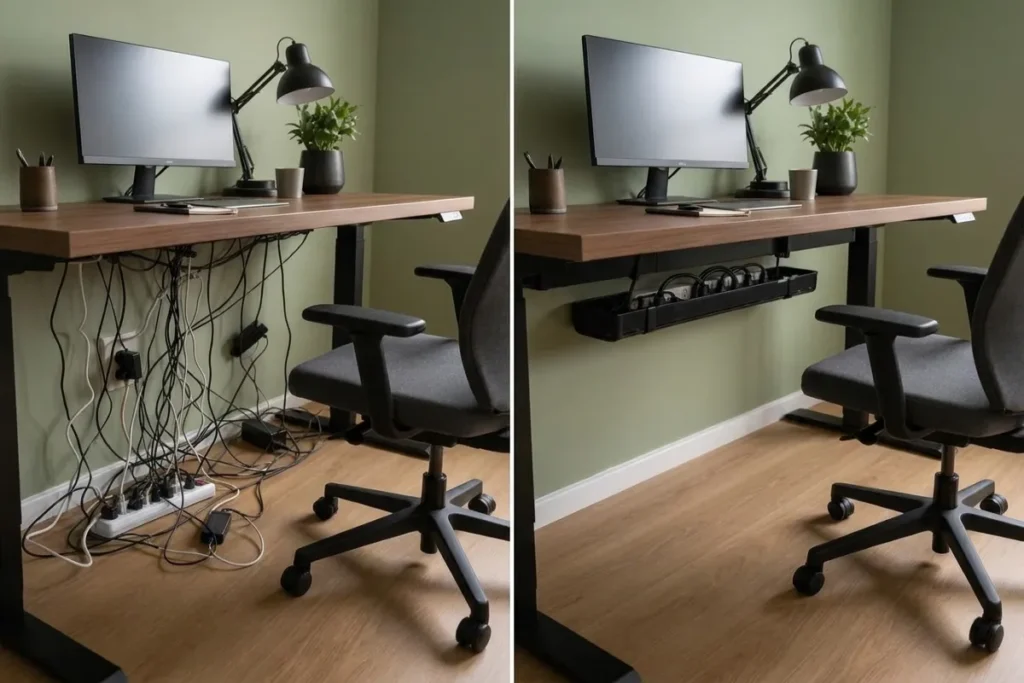
The modern home office is a marvel of technology. Between dual monitors, docking stations, heavy power bricks, mechanical keyboards, and charging hubs, our desks power an incredible amount of productivity. However, this tech-heavy environment comes with a significant downside: an unruly, tangled web of cables that pools on the floor. If you have ever kicked a power strip by accident or spent ten minutes tracing a single wire through a dusty knot, you know the frustration. Fortunately, discovering that an Under-desk cable tray fixes messy office cords is the ultimate game-changer for your workspace aesthetics and safety.
As we move deeper into 2026, the standard for a professional workspace has evolved. It is no longer just about buying the most expensive monitors or the most ergonomic chair. True workspace optimization requires managing the “digital nervous system”—the complex web of power and data cables that fuels modern productivity. A cluttered desk creates visual noise that adds friction to every work session. In this comprehensive guide, we will explore exactly why an Under-desk cable tray fixes messy office cords so effectively, how to choose the right one, and the step-by-step method to transform your setup from a chaotic hazard into a minimalist dream.
Unleash Your Setup: The Best Desk Upgrade for Work & Play! in 2026
Table of Contents
The Hidden Cost of Messy Office Cords
Before we dive into the solutions, it is crucial to understand the real impact of cable clutter. It goes far beyond simply looking bad on a video call. Unmanaged cables affect your mental state, your physical health, and the longevity of your expensive hardware.
Psychological and Productivity Impacts
Visual clutter directly translates to cognitive load. When your peripheral vision is constantly processing a tangled mess of wires, it subtly drains your focus. Studies in workspace psychology continually show that a clean, organized environment fosters better concentration and reduces baseline stress levels. Productivity has a distinct look, and tangled cords sprawling across your floor are not it.
Furthermore, poor cable management wastes valuable time. If you need to swap out a peripheral or pack a charger for a trip, a disorganized setup means spending unnecessary time untangling wires. When everything is routed properly, pulling a cable takes ten seconds instead of ten minutes.
The Ergonomic and Safety Risks
Loose cables underfoot are a trip hazard—literally. But beyond the obvious risk of tripping, poor cable management severely impacts your ergonomics. The Canadian Centre for Occupational Health and Safety (CCOHS) emphasizes that changing postures throughout the day is vital for preventing Musculoskeletal Disorders. If your cables are too short or tangled around your desk legs, they act as physical tethers. You might hesitate to transition your standing desk from sitting to standing because you fear a cable will snag or a monitor will tilt.
When an Under-desk cable tray fixes messy office cords, it removes this physical and psychological friction, allowing you to move freely and utilize your ergonomic furniture as intended.
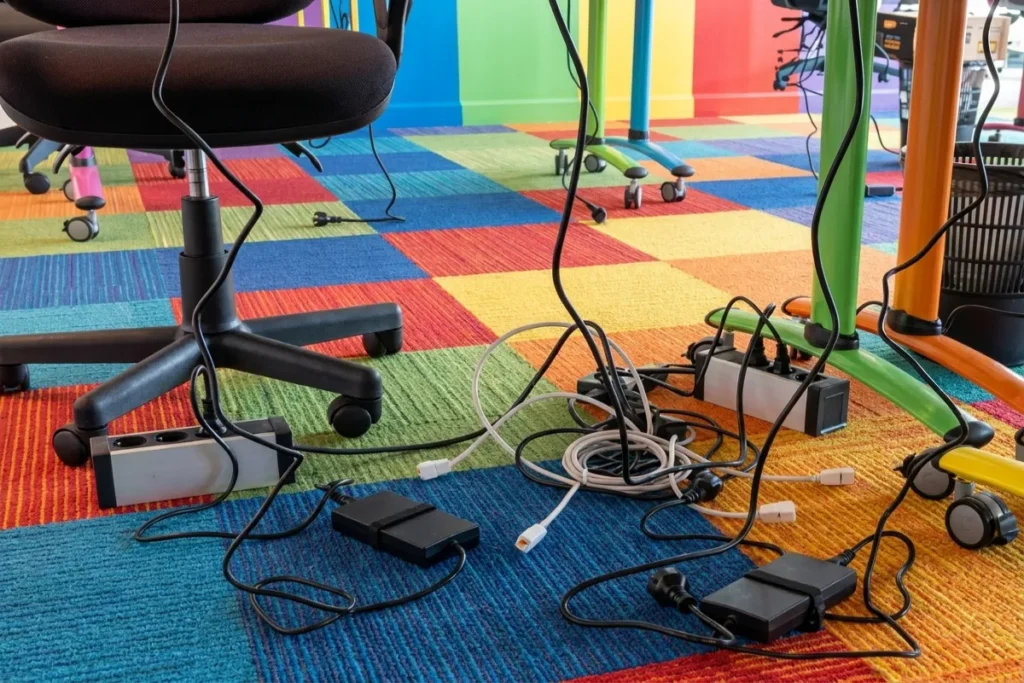
Why an Under-Desk Cable Tray is the Ultimate Fix
You might be wondering why you can’t just use a handful of zip ties and call it a day. While ties and adhesive clips have their place, they are supplementary. The core of any clean setup requires structural support.
Reclaiming Legroom and Desk Space
An under-desk tray acts as a basement for your desk. It is a dedicated, hidden zone where the bulkiest items—like surge protectors, massive laptop power bricks, and excess cable length—can reside out of sight. By elevating these components off the floor, you instantly reclaim your legroom. You can finally stretch your legs without fear of accidentally toggling the power switch on your surge protector and shutting down your computer in the middle of a project.
The biggest visual impact per dollar comes from hiding these power strips and loose ends below the surface. It transforms your space from a “cluttered storage” area into a focused, intentional zone.
The End of “Desk Stalls” on Standing Desks
If you use a height-adjustable standing desk, cable management is not optional; it is mandatory. When cables are left hanging, raising the desk can pull devices right off the surface or damage expensive connectors. In professional setups, a phenomenon known as a “desk stall” occurs when a standing desk appears to have a motor failure, but in reality, it is simply being held back by a taut, unmanaged cable.
An under-desk tray moves the entire ecosystem of devices together. Everything plugged into the power strip travels with the desk, meaning only one main power cable needs to run to the wall socket. This single-cable umbilical cord approach is the secret to a flawless standing desk setup.
Key Features to Look for in 2026
Not all cable trays are created equal. In 2026, our gear is heavier, more powerful, and generates more heat. Here is what you need to look for when shopping for a tray that will go the distance.
Materials: Steel Mesh vs. Plastic
Stop buying flimsy plastic baskets. Modern dual monitor arms, heavy GPUs, and thick braided cables add up quickly. A cheap plastic bin will sag, crack, or drop your power strip over time.
You should aim for trays constructed from powder-coated steel or reinforced aluminum. These trays support at least 15-20 lbs (7-9 kg), providing total peace of mind. Beyond strength, a metal mesh design is vastly superior for several reasons:
- Airflow: Power bricks generate heat. A mesh tray lets that heat escape, keeping your gear cool and preventing the degradation of plastic components.
- Signal Integrity: A properly grounded metal mesh can act as a partial Faraday cage. This reduces electromagnetic interference (EMI) and crosstalk between high-frequency data cables and power lines, which is essential for maintaining stable frame rates in gaming or high-end video editing.
Thermal Dynamics and Air Gaps
Heat buildup is a silent killer of electronics. Cables and adapters piled tightly together trap heat. To prevent this, engineering analysis recommends maintaining a 1-2 inch (25-50mm) air gap between the tray surface and any large power strip or adapter. This allows for passive convection cooling. When you choose an open-basket or mesh tray, you naturally facilitate this cooling process, ensuring your expensive hardware lasts longer.
The 30% Cable Weight Rule
When calculating how much your tray needs to hold, don’t just weigh your power strip. You must account for the power bricks, the USB hubs, and the cables themselves. A good heuristic used by professionals in 2026 is the 30% rule: multiply the total weight of your power bricks and strips by 1.3 to account for the weight of the cables themselves. For a robust multi-monitor setup, the total tray load can easily reach 13kg (~28.6 lbs). Always ensure the tray you purchase is rated for this capacity.
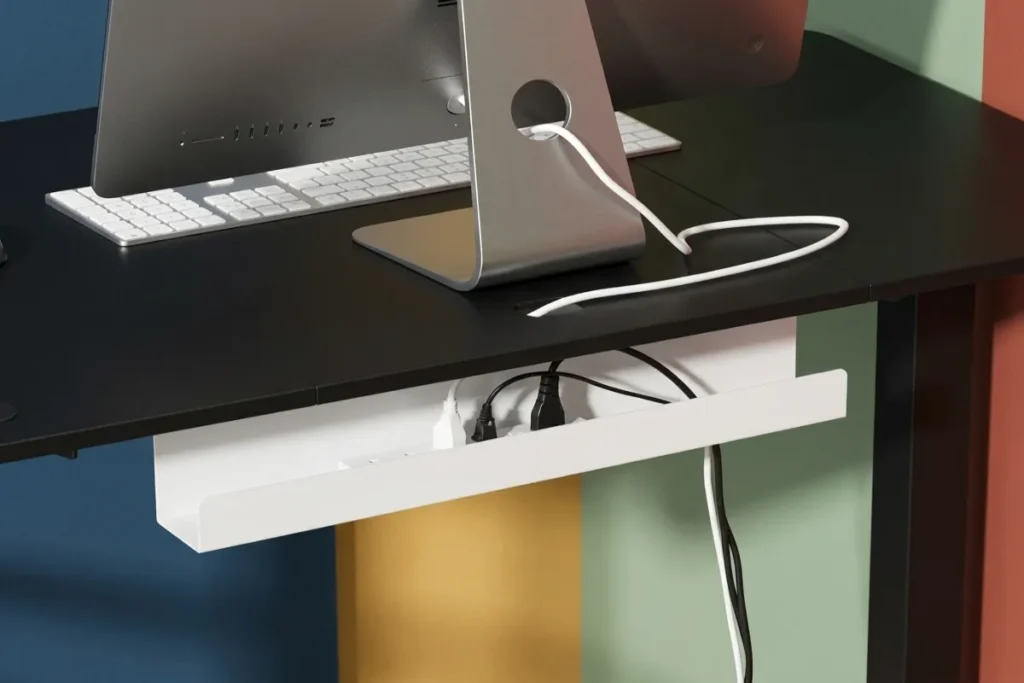
Step-by-Step Installation: How to Fix Your Setup
Knowing that an Under-desk cable tray fixes messy office cords is only half the battle. The execution is what separates an amateur setup from a professional one. Set aside 30 to 60 minutes for this one-time project.
Step 1: The Total Unplug and Audit
Start with a clean slate. Unplug every single cable from your computer, monitors, and wall outlets. Lay them all out on the floor. This is the time to audit what you actually use. That mystery micro-USB charger from five years ago? Remove it. Only keep the cables that actively serve your current daily workflow.
Step 2: Sorting, Bundling, and Labeling
Group your cables by function: power cables together, data cables together, and peripheral cables together. Use reusable Velcro ties—never zip ties, which require scissors and risk cutting your wires if you ever need to upgrade.
Labeling is a pro-tier move. Use small tags or a piece of masking tape near the plug of each cable. When you need to troubleshoot a monitor or swap a keyboard months from now, future you will be incredibly grateful that every cord has a name.
Step 3: Mounting the Tray (Central vs. Rear)
Installation methods vary. Some trays use strong adhesives, while others require drilling. While adhesives have improved, they can weaken in high-humidity rooms or peel from particle board over time. For a permanent, heavy-duty setup, screw mounting is always preferred.
If you are using a standard desk, mounting the tray toward the rear edge keeps it completely out of sight. However, if you are using a standing desk, central mounting (directly under the center of the desktop) is often superior. Rear-mounted heavy trays create a “pendulum effect” during height adjustments, causing lateral wobble. Central mounting keeps the center of mass closer to the desk’s lifting columns, providing a much smoother transition.
Step 4: Routing and the “Vertical Stack”
Place your heavy surge protector at the bottom of the tray. Instead of spreading cables horizontally and creating a mess, use the “Vertical Stack” method if your tray has sufficient depth (at least 4 inches). Layer the heaviest items at the bottom and route bundled cables over them.
Pay attention to the bending radius of your data cables. High-speed DisplayPort or HDMI 2.1 cables should never be bent at sharp 90-degree angles. Maintain a gentle curve (about 4 times the cable diameter) to prevent signal degradation.
Route the cables coming from your monitors down a single desk leg or monitor arm, securing them with Velcro or adhesive clips. Finally, plug everything into the tray’s hidden power strip.
1.Unplug and Audit:Remove obsolete cables.
Disconnect everything and lay it out. Remove cords you no longer use daily.
2.Group and Label:Use Velcro, not zip ties.
Group cables by power vs. data. Apply label tags to the ends of the cords.
3.Mount the Tray:Central mounting for standing desks.
Screw the tray into the desk. Prefer central mounting for standing desks to prevent wobble.
4.Stack and Route:Mind the bending radius.
Place the power strip at the bottom. Bundle cables and route them gently without sharp kinks.
Expanding the Ecosystem: Accessories to Pair with Your Tray
An under-desk tray is the heavy lifter, but to achieve a flawless 100% hidden cable setup, you should pair it with a few affordable accessories.
Velcro Ties and Cable Sleeves
As mentioned, reusable Velcro straps cost around $8 for a pack of 100 and are infinitely better than plastic zip ties. They allow you to bundle cords coming down from your monitors into a single, clean line. For highly visible runs—such as the single power cord running from the desk down to the wall outlet—a fabric cable sleeve provides a premium, polished look that hides the wires entirely.
Hardware KVMs and Thunderbolt Docks
If you switch between a work laptop and a personal gaming PC, cable clutter multiplies rapidly. A KVM switch or a high-quality Thunderbolt dock can be mounted directly under the desk, right next to your cable tray. This allows you to plug your monitors and peripherals into the dock, meaning only one single cable needs to run up to your laptop on the desk surface.
Cable Management Maintenance: The 2026 New Year Checklist
Cable management isn’t just a one-and-done project if you frequently upgrade your gear. To maintain a safe and optimized setup, professionals recommend an annual audit.
- Load Audit: Check that the total weight in your tray hasn’t exceeded its maximum rating.
- Length Check: Ensure your standing desk can still reach its maximum height without pulling cables tight. Always leave at least 25% slack in your main power line.
- Thermal Gap: Verify that your power bricks still have a 1-2 inch clearance for airflow and aren’t being smothered by new cables.
- Structural Check: Inspect the mounting screws and tray joints for any signs of material fatigue, sagging, or loose screws.

Conclusion + CTA
A messy workspace drains your energy, creates safety hazards, and limits your productivity. Taking the time to properly route your wires is an investment in your daily peace of mind. By ensuring your hardware is secure, ventilated, and organized, an Under-desk cable tray fixes messy office cords permanently, elevating your home office to professional standards.
Ready to transform your workspace and say goodbye to cable clutter forever? Head over to thetekworld.com for more expert guides, premium tech reviews, and the best workspace optimization tips for 2026 and beyond.
Frequently Asked Questions (FAQ)
1. Do I have to drill holes in my desk to install a cable tray?
No, you do not always have to drill. Many trays on the market, such as the JOTO tray, come with heavy-duty adhesive pads or utilize C-clamp mounts that grip the edge of the desk without causing damage. However, for maximum weight capacity and longevity, screw-mounting is highly recommended, especially for heavy dual-monitor setups.
2. Can an under-desk cable tray hold my heavy power bricks and a large surge protector?
Yes, provided you choose the right material. High-quality steel or aluminum mesh trays are designed specifically for this purpose and can hold between 15 to 20 lbs safely. Always check the weight rating of the tray and use the 30% rule to account for the weight of the cables themselves.
3. Are cable trays safe to use with standing desks?
Absolutely. In fact, they are essential for standing desks. By keeping all power strips and adapters in the tray, the cables move seamlessly with the desk as it rises. This prevents “desk stalls” and protects your hardware from being yanked off the desk surface.
4. Why should I use Velcro ties instead of traditional zip ties?
Velcro ties are reusable, gentle on cables, and do not require tools to remove. Traditional plastic zip ties can easily bite into and damage fragile cable shielding, and requiring scissors to cut them open risks accidentally snipping a valuable wire.
5. How much slack should I leave for a standing desk?
When routing cables on a standing desk, always calculate the maximum standing height and add at least 25% extra slack to the main power cable running to the wall. This ensures the desk can transition smoothly without putting tension on the power outlet or the desk motors.

Comments